Jenkins is a powerful open-source automation server widely used for building, deploying, and automating projects. This step-by-step guide will walk you through the process of installing Jenkins on an Ubuntu-based DigitalOcean droplet.
Prerequisites
Before you proceed, ensure you have the following:
- DigitalOcean Account: Sign up for an account at DigitalOcean if you don’t have one.
- Ubuntu Droplet: Create a droplet running Ubuntu 22.04 (or the latest stable version). A minimum of 1GB RAM is required, but 4GB RAM and 2 CPUs are recommended for optimal performance.
- Root or Sudo Access: Ensure you have root or a sudo-enabled user to run administrative commands.
- Domain Name (Optional): If you want to access Jenkins using a custom domain, configure your domain to point to the droplet’s IP address.
- Basic Linux Knowledge: Familiarity with Linux commands and SSH.
- SSH Client: Tools like Terminal (Mac/Linux) or PuTTY (Windows) for connecting to your droplet.
- Firewall Rules: Ensure port 8080 (Jenkins default) is open or plan to configure your firewall during installation.
Step 1: Create a DigitalOcean Droplet
- Log in to your DigitalOcean account.
- Click on Create → Droplets.
- Select Ubuntu 22.04 as your operating system.
- Choose a droplet size (minimum 4GB RAM and 2 CPUs recommended).
- Set up SSH keys or use a password for authentication.
- Click Create Droplet.
Step 2: Update Your System
Once your droplet is up and running, connect to it using SSH:
ssh root@<your-droplet-IP>
Update the package index and upgrade installed packages:
sudo apt update && sudo apt upgrade -y
Check if Java is installed on your ubuntu machine.

If already install can skip the Step 3.
Step 3: Install Java 17
Jenkins requires Java to run. We will install OpenJDK 17:
sudo apt install openjdk-17-jdk -y
Verify the installation:
java -version
The output should show Java 17 as the installed version:

Step 4: Add the Jenkins Repository
Jenkins is not included in the default Ubuntu repositories, so you need to add the official Jenkins repository:
- Add the Jenkins GPG key:
curl -fsSL https://pkg.jenkins.io/debian/jenkins.io.key | sudo tee /usr/share/keyrings/jenkins-keyring.asc > /dev/null
2. Add the Jenkins repository:
echo deb [signed-by=/usr/share/keyrings/jenkins-keyring.asc] https://pkg.jenkins.io/debian binary/ | sudo tee /etc/apt/sources.list.d/jenkins.list > /dev/null
3. Update the package list:
sudo apt update
If none of the above steps work (Manually Download)
If none of the above steps work, you can manually download and install the .deb package for Jenkins. Here’s how:
wget -q -O jenkins.deb https://pkg.jenkins.io/debian-stable/binary/jenkins_2.414.1_all.deb
Download the Jenkins .deb package:
#install the jenkins
sudo apt install ./jenkins.deb -y
Step 5: Install Jenkins
Install Jenkins with the following command:
sudo apt install jenkins -y
Once installed, Jenkins will automatically start as a service.
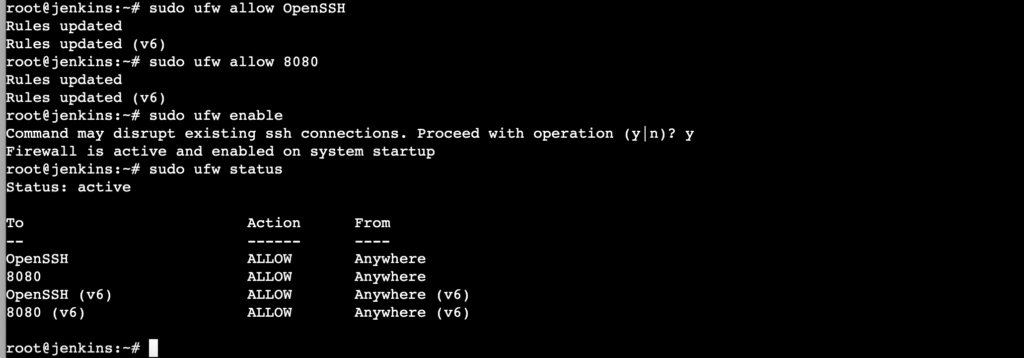
Step 6: Configure the Firewall
To allow external access to Jenkins, open port 8080 on your firewall:
Allow OpenSSH to prevent being locked out:
sudo ufw allow OpenSSH
Allow Jenkins traffic:
sudo ufw allow 8080
Enable the firewall:
sudo ufw enable
Verify the firewall status:
sudo ufw status
Step 7: Start and Enable Jenkins
Ensure Jenkins starts automatically after a reboot:
sudo systemctl start jenkins
sudo systemctl enable jenkins
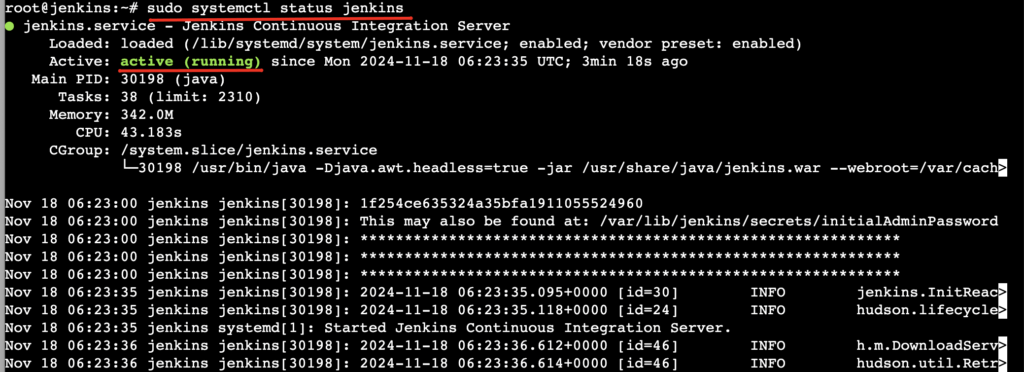
Check the status of Jenkins:
sudo systemctl status jenkins
Step 8: Access Jenkins Web Interface
Open a browser and navigate to:
http://<your-droplet-IP>:8080
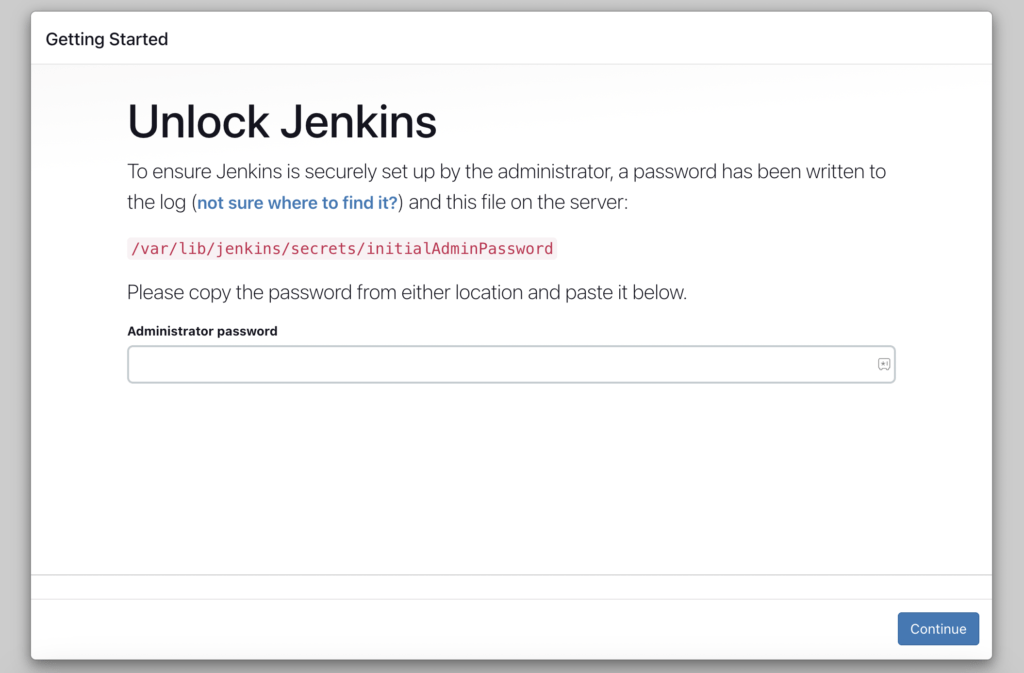
You will see the Jenkins unlock page.
Step 9: Unlock Jenkins
To unlock Jenkins, retrieve the initial admin password from the server:
sudo cat /var/lib/jenkins/secrets/initialAdminPassword
Copy the password, paste it into the web interface, and click Continue.

Step 10: Configure Jenkins
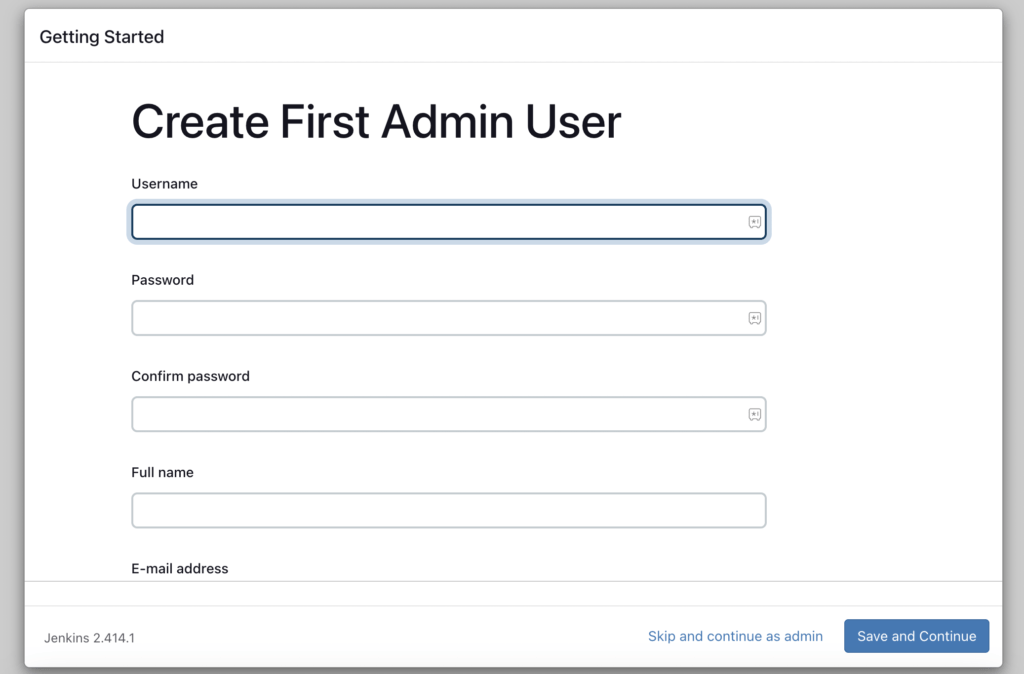
- Install Plugins: Select Install suggested plugins for the default set of plugins.
- Create Admin User: Set up an admin user with your credentials.
- Set Jenkins URL: Configure the Jenkins URL (e.g.,
http://<your-droplet-IP>:8080) and save.
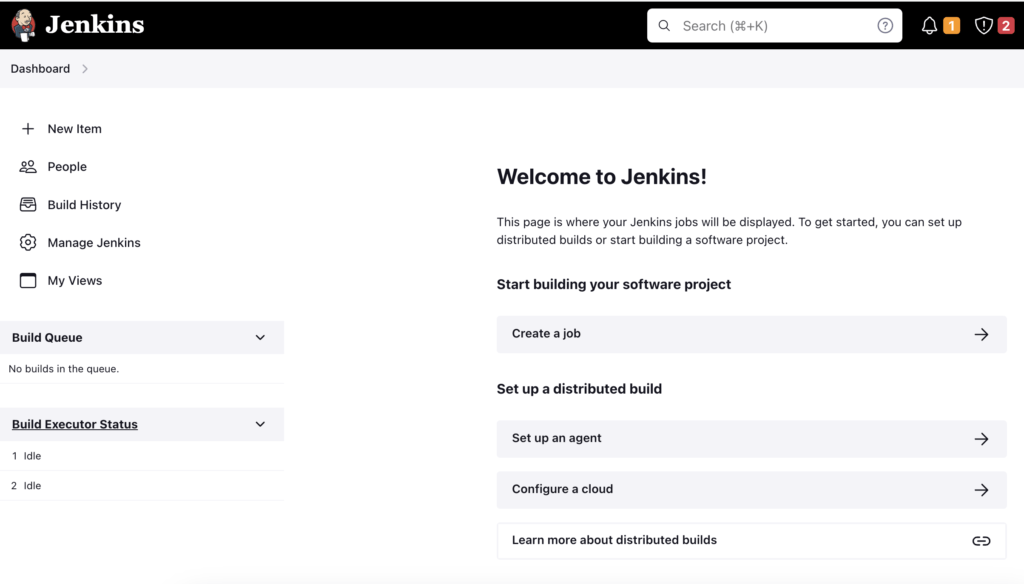
Conclusion
You have successfully installed Jenkins on an Ubuntu DigitalOcean droplet with Java 17. Jenkins is now ready to automate your CI/CD workflows and manage your builds.
If you encounter any issues or need advanced configurations, refer to the official Jenkins documentation. Happy automating!