React is one of the most popular libraries for building modern web applications, and when combined with Vite, it offers a lightning-fast development experience. Vite is a modern frontend tool that provides faster builds and a better developer experience compared to traditional bundlers like Webpack. This guide walks you through the steps to set up a Vite + React project on a Mac.
Step 1: Prerequisites
Before you begin, ensure the following are installed on your Mac:
Node.js and npm
Node.js is required to run JavaScript code outside the browser, and npm (Node Package Manager) helps you install dependencies.
Install Node.js using Homebrew:
brew install node
Verify installation:
node -v
npm -v
Alternatively, you can download the latest version of Node.js from the official website.
Step 2: Create a Vite + React Project
1. Open the Terminal
Navigate to the directory where you want to create your project:
cd path/to/your/project-folder
2. Run the Vite Project Creator
Execute the following command to create a new Vite project:
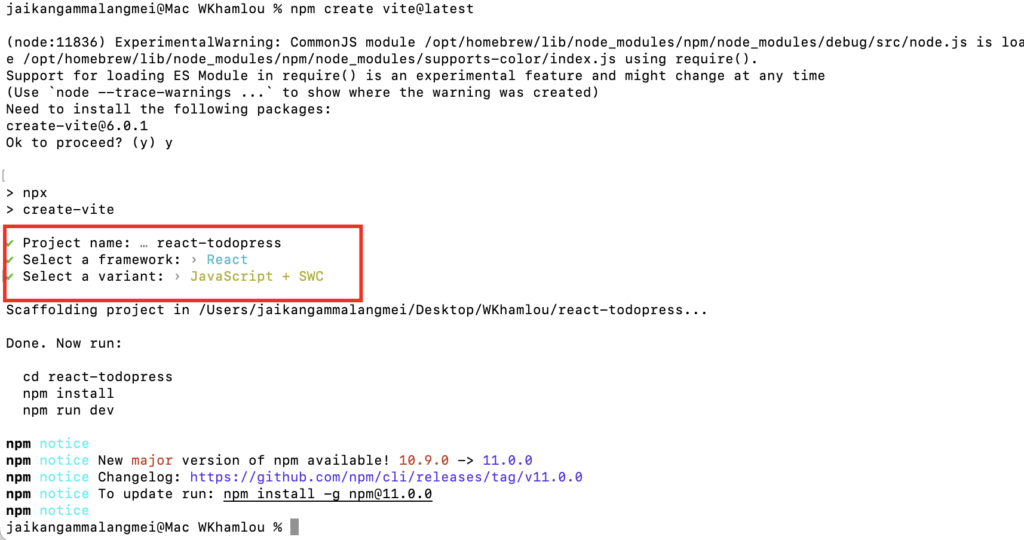
npm create vite@latest
3. Configure the Project
During the setup, you’ll be prompted to:
- Enter the project name: For example,
my-react-app. - Select a framework: Choose
React. - Select a variant: Choose
JavaScriptorTypeScriptbased on your preference. (In my case i pick JavaScript + SWC)
Vite will create a folder with your project name and generate the necessary files.

Step 3: Install Project Dependencies
Navigate to the newly created project folder:
cd my-react-app
In my case it is : cd react-todopress
Install the dependencies using npm:
npm install

Step 4: Start the Development Server
To start the development server and see your project in action:
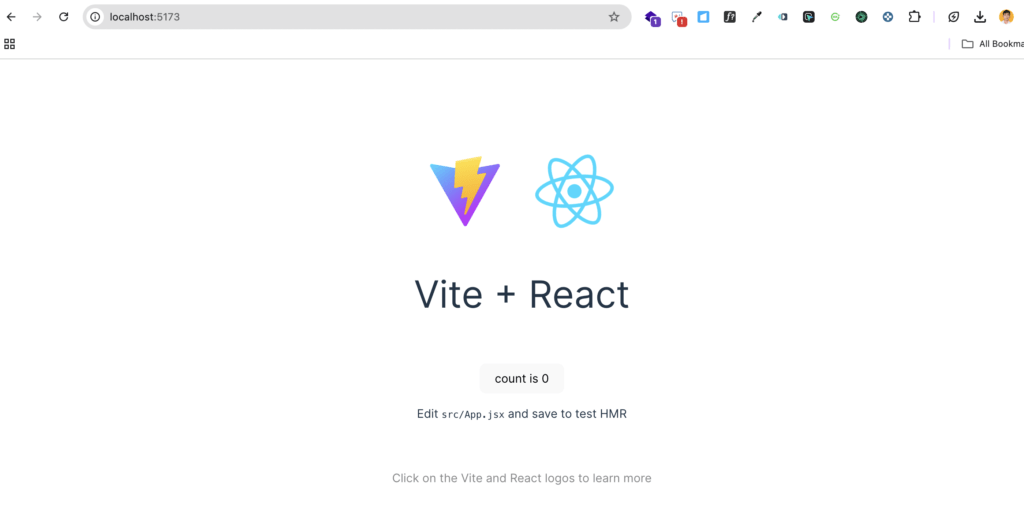
npm run dev
This command will start a local development server, and you’ll see a URL (e.g., http://localhost:5173) in the terminal. Open this URL in your browser to view your project.


Step 5: Initialize Git
1. Initialize a Git Repository
Inside your project folder, run:
git init
2. Create a .gitignore File
Before committing, add a .gitignore file to exclude unnecessary files (e.g., node_modules).
You can create it manually or use the following command:
echo "node_modules/" >> .gitignore
3. Stage and Commit the Changes
Stage all files and create an initial commit:
git add .
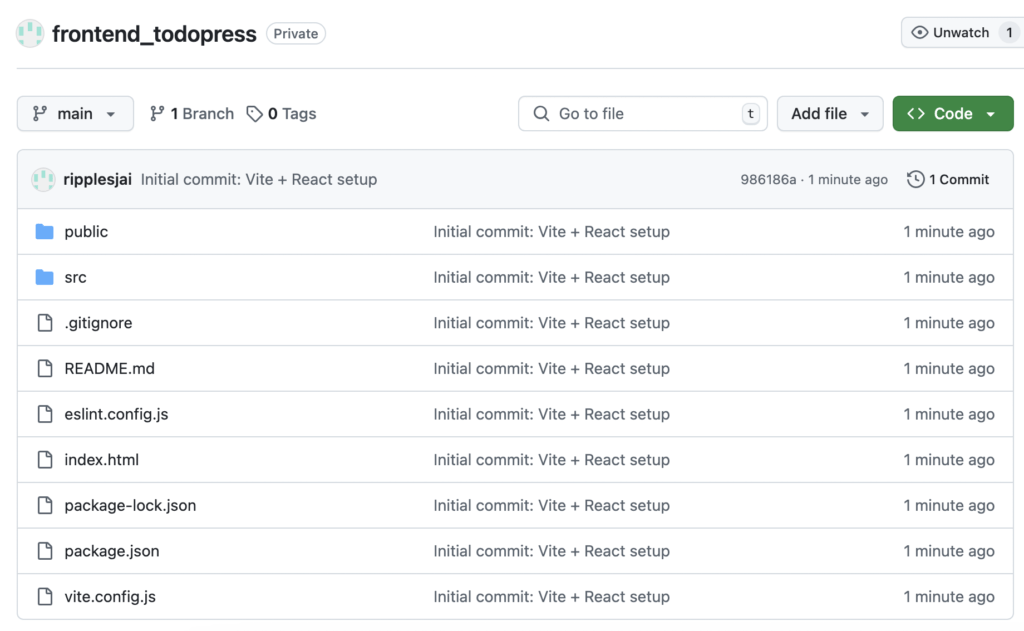
git commit -m "Initial commit: Vite + React setup"
Step 6: Push to GitHub
1. Create a New Repository on GitHub
- Log in to your GitHub account and click the New Repository button.
- Enter a repository name (e.g.,
vite-react-project), select public or private, and click Create Repository. - Copy the repository URL (e.g.,
https://github.com/your-username/vite-react-project.git).
2. Link Your Local Repo to GitHub
Run the following commands, replacing the URL with your repository’s URL:
git remote add origin https://github.com/your-username/vite-react-project.git
3. Push Your Code
Push your code to the GitHub repository:
git branch -M main
git push -u origin main

Your project is now live on GitHub!
Step 7: Continue Development
You can continue developing your project locally. When you make changes, follow these steps to push updates to GitHub:
Stage the changes:
git add .
Commit the changes:
git commit -m "Describe your changes"
Push the changes:
git push
Conclusion
Setting up a Vite + React project on a Mac is straightforward, and integrating it with Git and GitHub ensures your work is backed up and shareable. By following this guide, you now have a robust workflow for building and managing modern web applications. Start coding and enjoy the speed and simplicity of Vite with React!
If you have any questions, feel free to ask in the comments below.
Happy coding! 🚀